{The cartooning process} 1. Materials + rough sketches
Woofings!
Things have been busy here, especially as mum is busy with drawing the cartoons for my second book!
We often get asked what’s involved in drawing the cartoons, so I have convinced mum to show you how she does it.
There are various stages, so we will blog about each stage separately.
Making sure you have the right materials
The very first thing you need to do when cartooning is to make sure you have the right materials. And it can take a little bit of trial and error to find out what suits your own style.
Mum likes to draw the cartoons on holiday or when she’s out and about. Other cartoonists may do all their work at the compawter, but mum doesn’t want to do that, she enjoys hand-drawing.
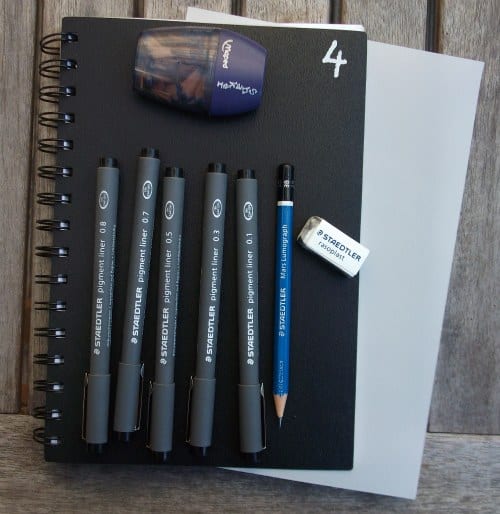
Here’s what mum uses for the hand-drawing:

Cartooning materials for Minnie The Westie cartoons
- Pad: mum uses an A5 spiral-bound drawing pad. Why A5 size? It fits into her handbag. 😉 She likes the texture of the paper of these particular pads from her local art shop.
- Pencils: mum uses a 3B pencil for sketching. That’s a reasonably soft pencil, so it’s easy to erase if needed. (Hard pencils can score lines into the surface of the paper, and that really bugs mum!)
- Eraser: not all erasers are created equal, apparently. Mum likes this Staedtler Rasoplast eraser.
- Pencil sharpener: one which catches all the shavings to avoid making a mess!
- Tracing paper: later on in the cartooning process, mum uses tracing paper. It is impawtant that the tracing paper is reasonably thick, as thinner papers tend to wrinkle. These wrinkles show up on the compawter scans… not ideal!
- Pens: it is impawtant that the outlining pens do not smudge on the tracing paper – they need to use Indian Ink. Mum uses a variety of pen thicknesses, from 0.1mm to 1.0mm. She is really enjoying these Staedtler pigment liner pens.
- Fold-back clips (not in photograph): impawtant for keeping the tracing paper in place at the outlining stage.
After the hand-drawing stages are complete, some of the work is carried out on a compawter. We’ll talk about compawter resources later in this series, we’ll just look at the hand-drawing work to begin with. And the first hand-drawing step is to make some rough sketches.
Step 1: Rough sketches
Mum says that doing these rough sketches is one of the hardest part of the cartooning. She has to:
- Figure out how many frames (or ‘boxes’) are needed for each page of cartoons. Ideally, a gag should fit all onto one page – unless it’s part of a story sequence. Some of my cartoons are one-page gags; others are sequences.
- Figure out how large each frame needs to be. The amount of text can be a deciding factor, so mum often begins by writing the text first, and then figuring out the rest.
- Decide on the composition of each frame. Making sure that each frame is well-composed is important.
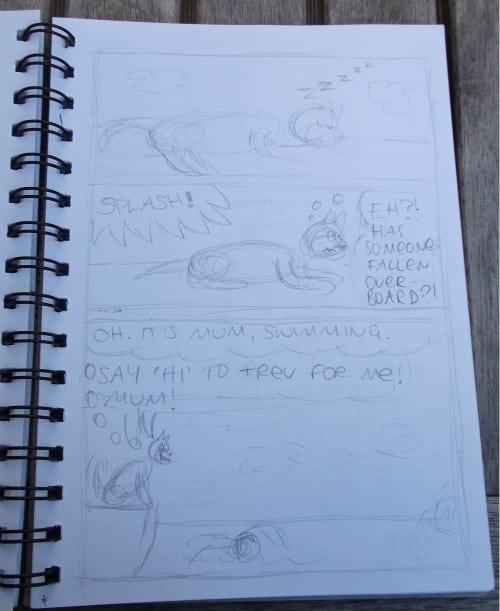
Examples of a rough cartoon sketch
Here’s an example of one of mum’s rough sketches. And as you can see, some of it is very “ruff” indeed – and also very faint. The faintness is on purpose; the sketch will be improved upon later in Step 2 of the cartooning process.

Step 1 of the cartooning process for Minnie The Westie cartoons: the rough sketch.
We’ll watch this particular cartoon (for my new book!) evolve. The next blog post in this mini-series will look at the next step: fine sketches.
Do come back and see how the cartoon takes shape!
Love ‘n’ licks,

To link to this post, use: https://www.minniethewestie.com/the-cartooning-process-1-materials-rough-sketches